One method to reinvent oneself online, or at least on the massive social network Mark Zuckerberg created, is to learn how to create a Facebook avatar.
For usage on Facebook or in Facebook Messenger, Facebook Avatars enable you to create a cartoon-like image of yourself. An avatar can be designed to either express your inner self or to appear like you. A grotesque could also be produced for cheap laughs.
Once created, you can use them to respond to comments or convey your emotions on Facebook in an unspoken manner. Continue reading to find out how to create a Facebook avatar.
What will you see here?
How to create your own Facebook avatar?
1. Open a Facebook account or log in.
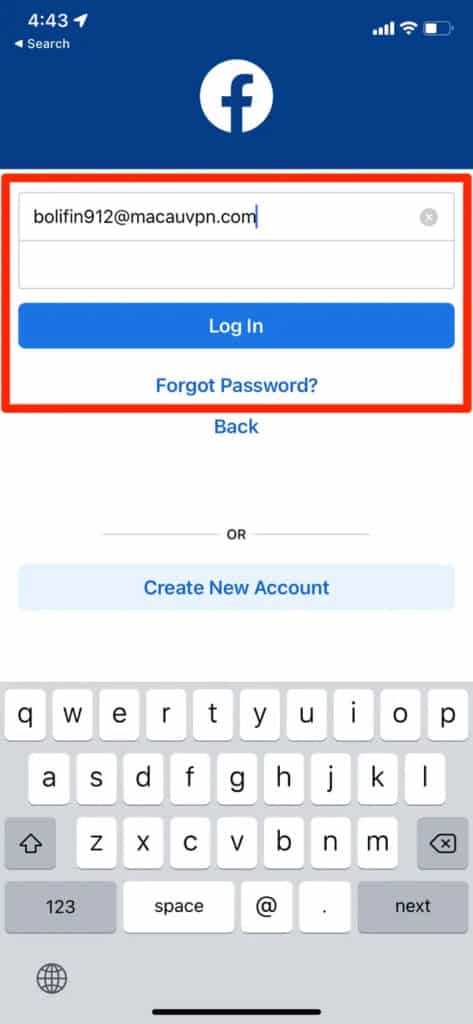
You must first log in to your Facebook account using the Android or iOS app before you can proceed with creating a Facebook Avatar. If you don’t already have the app, you can quickly get it from the Apple App Store or Google Play Store.
2. Create your own Facebook avatar: Activate the Facebook app’s menu.

To reach the menu option, tap on three lines that serve as the Facebook app’s menu icons or repeatedly swipe right.
3. Choose “Avatars”
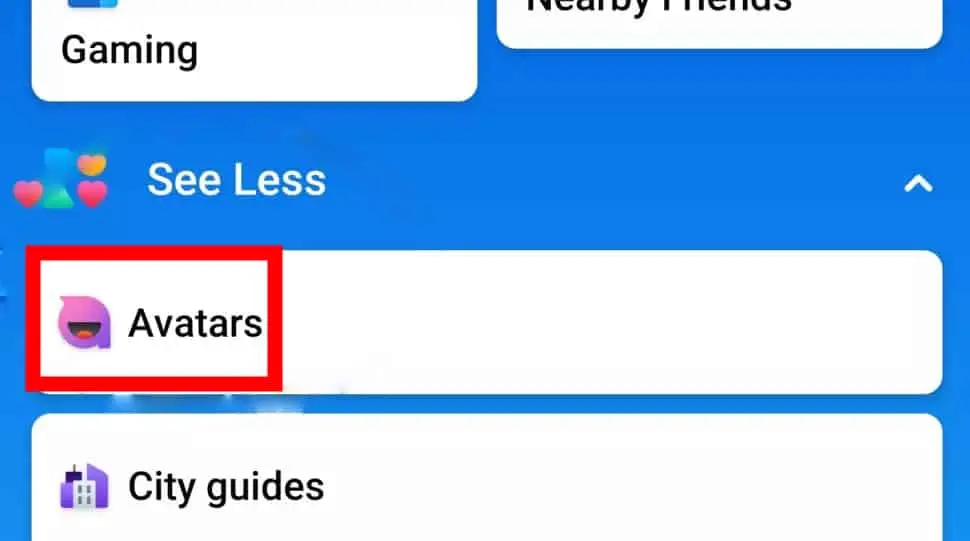
You’ll be presented with several alternatives when you’re in the app menu. You’ll see a “Avatars†option when you tap the “view more†button. Touch that.
4. Create your Facebook avatar now.
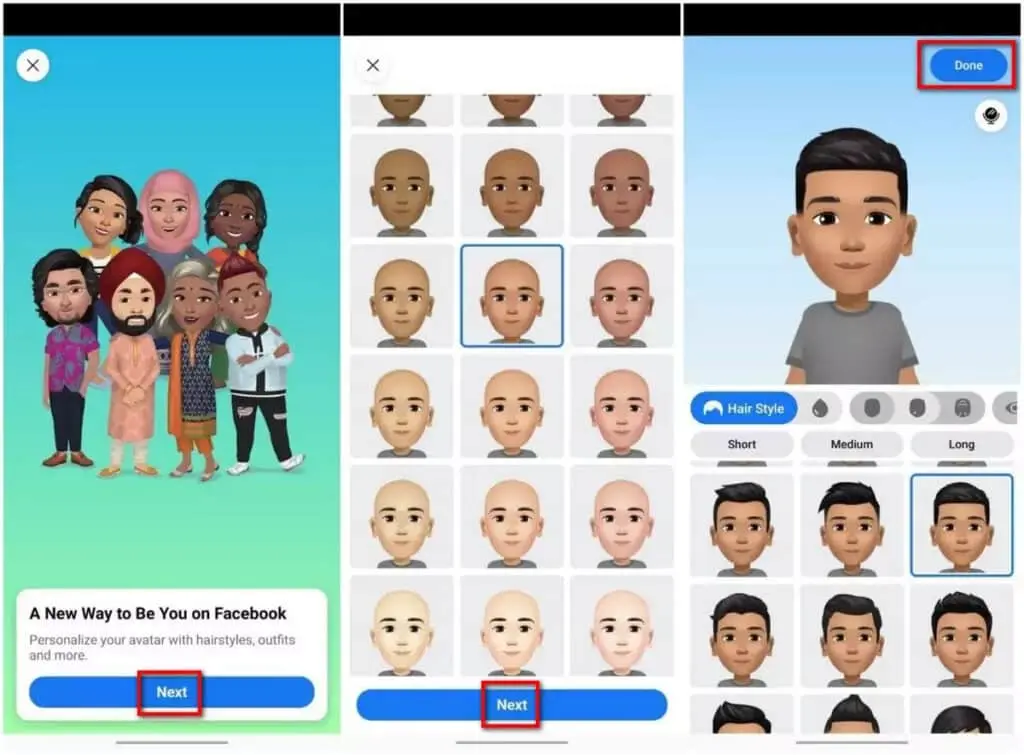
The remaining steps to build your Facebook avatar are as easy as following the on-screen directions after reaching the Avatars section.
These will ask you to choose your Avatar’s skin tone first, then their haircut.
You will then have the option to select your eye color, eyebrow shape, face shape, facial hair, and other features that help define your face. Additionally, you can decide if your Avatar should wear lipstick or glasses.
You also have the opportunity to select your body type and fashion sense after you’ve finished designing your Avatar’s head and face. Finally, if you’re in the mood for a hat, you can choose from various headgear.
When you finish, click next to access your Avatar. It’s that easy; you don’t need to grant Facebook access to data or submit images.
And if that’s what you want, you should end up with only an Avatar that roughly resembles yourself; after all, you may build any Avatar you choose.
How to use your Facebook avatar?

The Facebook Avatar you generated is beaming you with pride, whether it is a close representation of your physical self or some hideous monster. Or maybe you’ve just created the person you wish to be when you’re awake. Regardless, the moment has come to put it to use. You’ll be glad to know that using your Facebook Avatar is very simple if you’re sick of talking to people in words.
You can first reach a large audience by posting your Facebook avatar on Facebook, where it will show up in your friends’ News Feed.
The social network will also make a set of digital stickers for you, so that’s not all. These take the shape of packs of pre-decided reaction stickers. These can communicate your feelings and opinions regarding a post, anything in your Facebook feed, or a conversation with a Facebook friend. These stickers offer a range of methods to express yourself in peaceful digital form, from a simple thumbs up to bursting a champagne cork or reclining coquettishly by an open hearth with a rose between your Avatar’s teeth.
1. In the comments, use your Facebook avatar.
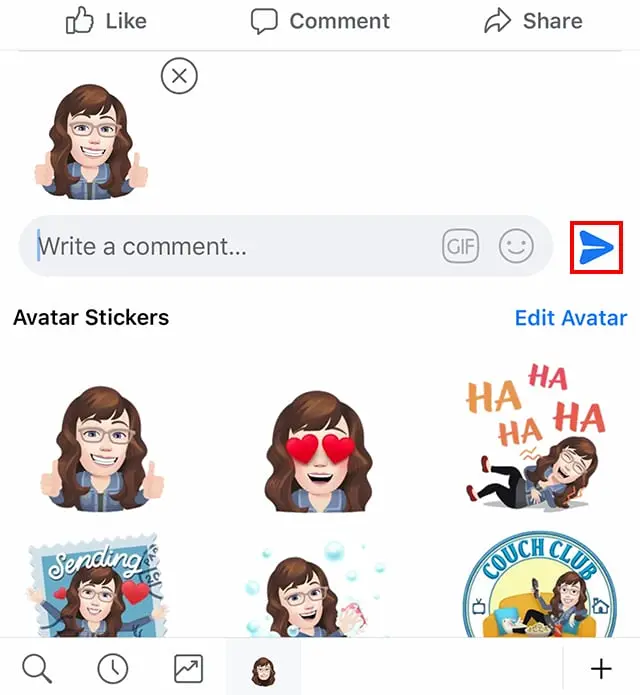
Tap the comment button, then the emoji button, to access your avatar stickers and the ability to utilize regular emojis when you wish to share your opinions on a post using your Avatar.
You can accomplish this a little more quickly on Facebook’s website by selecting the sticker button, where you see both your Avatar stickers and other, more generic ones.
2. Use your Facebook avatar in Messenger conversations.
You can do the same on Facebook’s web version for chat messages. Clicking the stickers button in a chat window will display a selection of stickers for you to use. Then select the icon that represents your Facebook Avatar to present with a choice of personalized Avatar stickers.
And the Messenger app supports the Avatar reaction stickers. To get your Avatar stickers, hit the emoji icon in the chat bar, tap the stickers menu & swipe right. You’ll have many stickers at your disposal to use as you like.
Yeah, I think that’s it. The global rollout of Facebook Avatars is still ongoing, and, likely, both the Avatars and the reaction stickers will eventually be implemented in other Facebook-owned services. However, we must wait to see what Facebook will do next.
Conclusion
As almost all messaging apps have demonstrated, we enjoy making cartoon versions of ourselves.
Therefore, Facebook’s Avatar function is for you if you enjoy Nintendo Miis, Bitmojis, or Memojis. You may do this to make a cartoon representation of yourself for Facebook Messenger’s sticker reactions and profile picture.
You cannot choose specific shirts, slacks, dresses, or skirts, in contrast to some apps. However, you can alter your Avatar’s skin tone, hair color, eye color, shape, appearance, and more.
However, if you make one, you may also use it on your PC. Its avatar creator is only accessible on the Facebook app. Once complete, you can use your Avatar in messages or comments.
Here is how to create your own Facebook avatar.


