With the recent announcement about Windows support for Luna Display 5.0, you can now use your iPad as a secondary wireless display for your Windows PC. Before getting started with it, here is everything you need to know about Luna Display 5.
What you will see?
What is Luna Display 5?
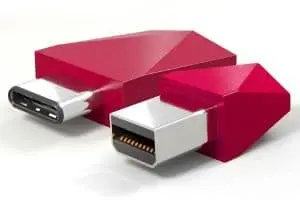
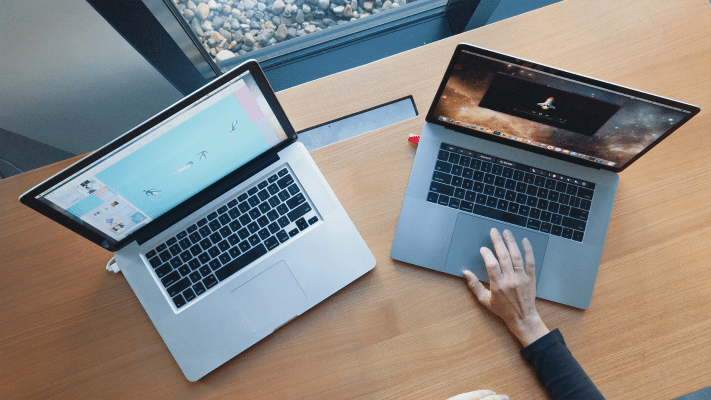
Luna Display is basically a small dongle which when you plug into your Mac laptop or desktop, wirelessly connects to your iPad. Thus enabling you to use your iPad as a second screen. It lets you connect the two devices using Wi-fi. Moreover, the featured software is needed for this connection. But you can even use it as a wired connection if your wi-fi network is poor or you don’t have Wi-fi.
As soon as the two devices are connected, your iPad screen becomes your Mac’s screen. You can free up your Mac’s screen by dragging apps and programs from your Mac screen to your iPad screen.
With its help, you can even use your iPad to navigate the apps and programs that have been moved to the device using gestures or keyboards. For example, if you have moved the Mail app to the iPad, you could scroll through your inbox. You can scroll through the inbox using two fingers to swipe and select a mail using one finger to tap. Then respond to the email you can use the iPad keyboard or the keyboard you have connected.
Luna Display uses “Liquid Technology” for faster performance at 60 fps in wireless second screen technology. Moreover, it uses the graphics card for better graphics acceleration restricting any lag.
Pros
- Simple setup
- No wires
- Works with third-party iPad keyboards
- Optimized for touchscreen gestures
Cons
- Expensive
- Noticeable lag
What you need?
Luna Display is a small dongle that allows your iPad or any other device to act as an external display. You can use it for both Mac and PCs choosing the right port, USB-C or HDMI for PC, and USB-C or MiniDisplayPort for Mac. For your system to work with iPad it should have:
- Windows– Microsoft Windows 10 64-bit
- Mac– 2011 or later model with macOS 10.11 or later. You can use this for either Mac-to-iPad mode or Mac-to-Mac mode, where this will be the primary Mac.
- Secondary Mac– Mac running macOS 10.11 (El Capitan) or later
- iPad– iOS 12.1 or later
- WiFi/Network– 802.11n or wired Ethernet or Thunderbolt cable to connect in Mac-to-Mac Mode or a USB cable for Mac-to-iPad Mode
Connect your devices
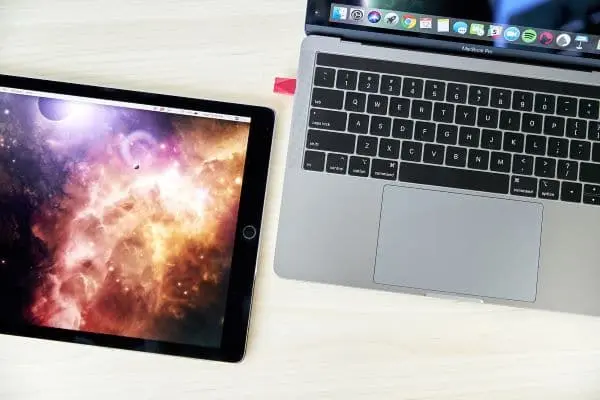
Connecting via WiFi
- Connect to the same WiFi network on both of your devices.
- Plug in the Luna hardware.
- Open the app on both the Primary and Secondary devices.
- Luna Display will automatically wirelessly connect.
Connecting via USB Cable- For Mac-to-iPad Mode
If your WiFi connection is not reliable, you can connect using a USB cable. Here is how:
- Plug your iPad-compatible USB cable into Mac port.
- Use a separate port from the Luna hardware.
- The cable will provide a constant and consistent connection between the devices.
Connecting via Ethernet or Thunderbolt- For Mac-to-Mac Mode
You can use an Ethernet cable or a Thunderbolt cable to connect both your Macs. Moreover, you can use the Ethernet cable to connect your Macs directly to your router.
Screen Settings and Arrangements
- After you successfully connect the devices, you will see a menu with Luna Display’s Settings.

- You can customize the Luna screen display arrangement of the Secondary device.
- You can set the alignement to the left or right side of your Primary Mac desktop.
- Or else click on Custom. With this you can quickly access Display settings and resolution in macOS System Preferences.
Enable Retina Display
By default, when you get started, the Retina Extension feature is turned off. Here is how you can enable Retina in Mac-to-iPad Mode:
- Install the Luna Display Retina Extension.
- Go to System Preferences on your Mac.
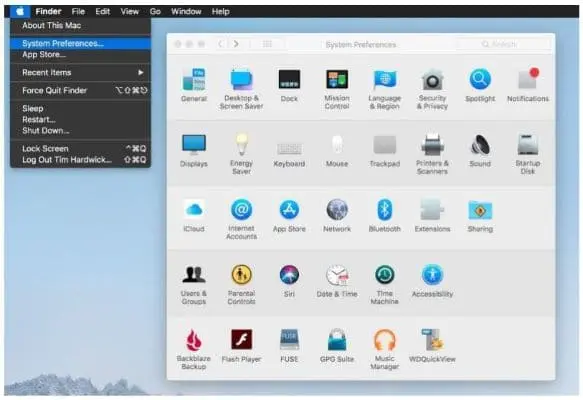
- Click on Security & Privacy.
- In the General tab, check if Allow apps downloaded from is selected for Astro HQ, LLC.
- You just need to click the Allow button.
Remember that, if your Mac or iPad does not support Retina Display, it cannot be enabled. Also, currently, Mac-to-Mac Mode does not support Retina.
Adjust Screen Resolution
After you enable Retina, the screen resolution on the iPad sets to Luna Display’s HiDPI option. It automatically fits in both Retina and the screen size of the iPad. You can adjust the Screen Resolution settings in Displays in macOS System Preferences.
What you might not like?
Even though the company promises software that doesn’t lag, it is heartbreaking that Luna Display still lags. Even with the Liquid Technology, you can see a significant blur effect whenever you move any Mac program or app around on your iPad. You will see the blurring only when you move something around on the iPad’s screen. But you will see this only for about a half-second. Moreover, there is so much wireless software available in the market that has much worse glitching, blinking, and lagging. Considering all this, Luna Display is obviously better.
In spite of the fact that, when you connect your MacBook Pro to your iPad Pro utilizing Luna Display and a wired USB connection, you actually get a similar blur impact.
This confirms that the wireless connection is not at fault here.
You might feel that Luna Display is a bit expensive, costing you $80. You might feel that you can get a similar experience using Duet Display and a wired connection at a lower price.
Conclusion
Luna Display is a small dongle that allows an iPad or a Mac to be used as a secondary display for a primary Mac or Windows PC. It has an easy setup and useful wireless connection, making it a great choice for your computing experience. Moreover, you can now connect your Mac as well as Windows PC with your iPad wirelessly and enjoy a second screen. With the added Ethernet and Thunderbolt support for Mac, Luna is leveling up to its competitors. Also, you can choose the dongle compatible with your PC. The USB-C option supports both Mac and PC, whereas the HDMI dongle only supports PCs.
If you have any questions, you can ask us in the comments section below.

