Creating screenshots on a MacBook is really simple. Screenshots have their uses. On your Apple MacBook, taking a screenshot is as easy as pressing a few buttons. On occasion, your plan may need you to take screenshots on your MacBook. You may take several different kinds of screenshots using your keyboard, such as ones of your full screen, a portion of it, or even just a single window or menu. If your machine is running macOS 10.14 or higher, you may also utilise a shortcut to launch the Screenshot software, which has additional settings and can record your screen. On a Macbook, there are fortunately a number of ways to take a screenshot without losing image quality.The foundational concepts will be reviewed here in this article and several third-party screen capture tools for MacBooks will be mentioned.
What will we see here?
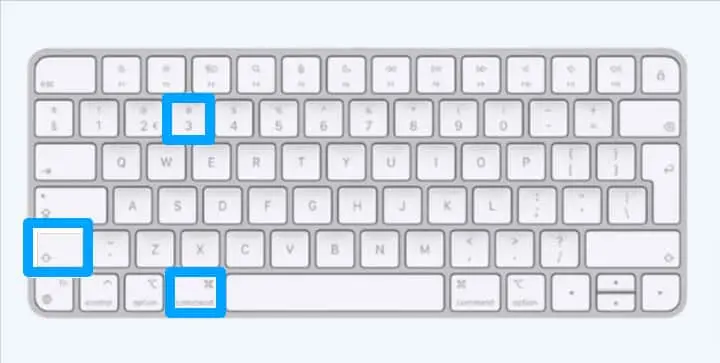
Take a Screenshot of the whole screen with shift+Command+3
The full screen of your MacBook may easily be screenshotted. Take the following actions:
Shift+Command+3
- You should press and hold the Shift, Command, and key 3 on your MacBook keyboard.
- Click the thumbnail to alter the screenshot when it displays in the bottom right corner of the screen. Wait until the screenshot saves to your workspace as an alternative.
- To copy the snapshot to the clipboard, use Command + Shift + 3 + Control.
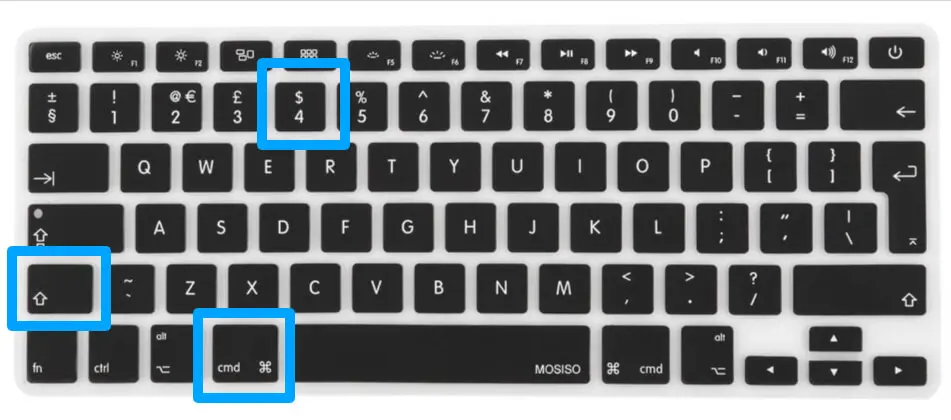
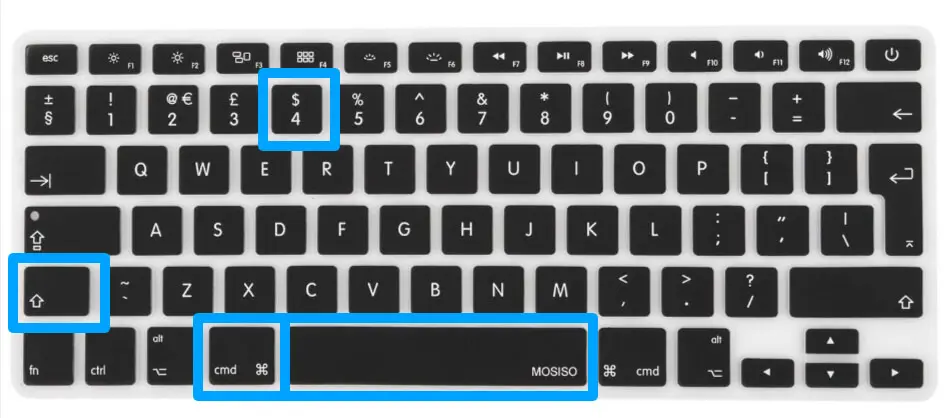
Take a Screenshot of the Portion of the screen with Shift+Command+4
- Press and hold the Shift, Command, and 4 keys on your keyboard at the same time.
- The mouse cursor is now a crosshair.
- The screen area you wish to capture will then be where the crosshair is. It would be preferable if you depressed the space bar for a sufficient amount of time to move the cursor.
- When you are satisfied with your selection, let go of the mouse button.
- The screenshot will appear on your desktop.
How to take a Screenshot of a Window or Menu: Shift+Command+4–Spacebar
- The spacebar key on your keyboard is pressed when Shift, Command, and 4 are depressed.
- The mouse cursor is now the camera icon.
- Use the mouse to click a window to take a screenshot of it.
- If you successfully picked the window or menu, it will also be highlighted in blue.
- To avoid the window’s shadow from appearing in the screenshot, hold down the Option key when choosing.
- The screenshot will not be taken if the Esc key is pressed.
- The screenshot will appear on your desktop.
Take a Screenshot with the Screenshot App
You can only utilise this choice if your MacBook is running macOS 10.14 or later. Right now, the complete screen capture menu is visible.
- A little grey toolbar will appear when Shift+Command+5 is pressed.
- If you want to take a screenshot of the entire screen, click the first picture.
- To take a screen shot of the window, click on the second picture.
- If you wish to screenshot a specific area of the third image, click it.
- If you want to take a video of the entire screen, click the fourth image.
- If you want to take a video of the fifth image’s portion of the screen, click it.
- After choosing, press Capture to save the screenshot.

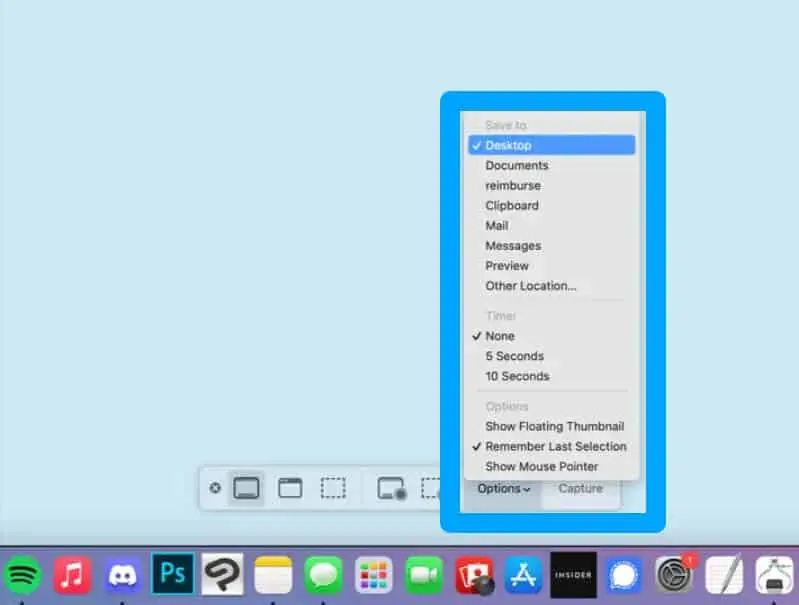
Additionally, there is a menu named Options. This menu offers a variety of options, including where to store your screenshot.
How to Open Screenshots?
When you select the capture option after successfully capturing a screenshot and being satisfied with it, your screenshot will be stored. When you click on the screenshot at that moment, a little thumbnail will appear in the bottom-right corner of the screen. Show Floating thumbnail is referred to as a thumbnail. Your screenshot won’t be saved to your computer until this thumbnail disappears after a brief interval.
You may click this image to open the screenshot in a new window before it disappears, though. You have the option to remove, crop, or share this window with your Apple ID account. On it, you may even draw or write.
Where are Screenshots Saved
The desktop is where screenshots are initially saved, and from there, users may choose where they want to save them.
- Screenshots are frequently saved on the desktop of the MacBook.
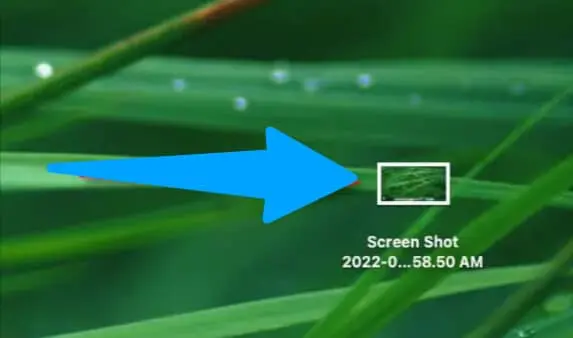
- When you utilize shortcuts like Shift+Command+3, Shift+Command+4, or Shift+Command+5, your Mac saves screenshots you take as PNG files to your Desktop. Each will have the heading “Screen Shot” with a date and time at the conclusion (for instance, “Screen Shot 2022-09-27 at 12.01.12 PM”).
These procedures should be taken to choose a new saving location:
- Pressing Command, Shift, and 5 simultaneously.
- After that, the advanced screenshot menu will appear.
- On this menu, select Options.
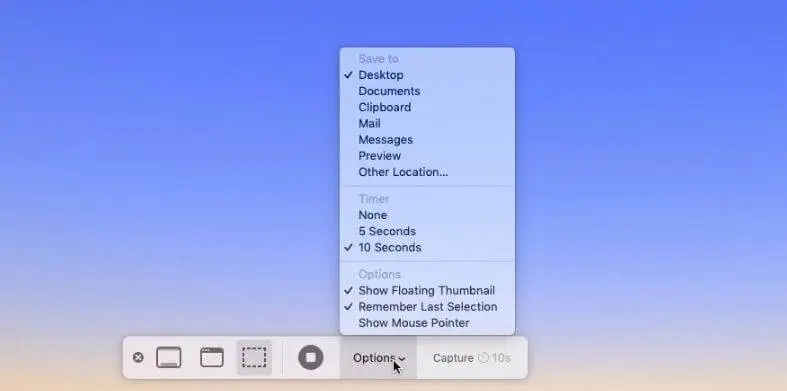
- This Options menu is made up of the Save to, Timer, and Options sections.
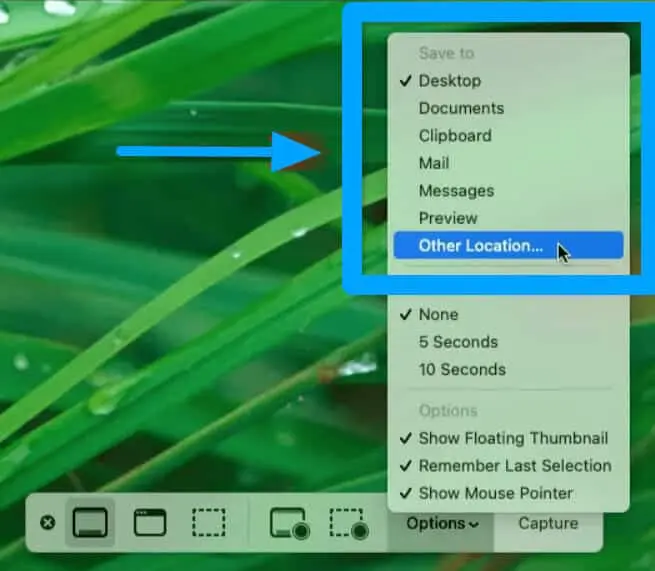
- You may choose “Other location” to choose a new folder to store your screenshot to in the first section’s “Store too” section.
- After selecting the new location, any screenshots you take will be saved.
How to find Lost Screenshots
If your screenshots aren’t showing up on your desktop, use Shift+Command+5. Out of the screenshot toolbar, choose “Options.” The “Save To” box will show a checkmark next to the location where screenshots are presently stored, such as “Desktop,” “Documents,” or “Preview.”
If you still don’t have any screenshots,
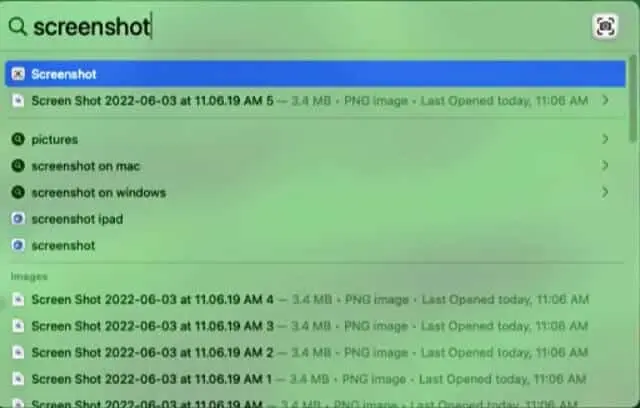
- Simply press Command+Space on your keyboard to start Spotlight search.
- A list of screenshot files that match your search terms will show up when you put “screenshot” into the search field.
- Double-click on a screenshot in the results to open it.
Take Screenshots using the Touch Bar
If your Mac features the Touch Bar, which is not the case with all models, you may snap a screenshot. To capture a screenshot, press Shift + Command + 6.

Take and Edit Screenshots in the Preview App
There are features other than PDF editing in the Mac version of the Preview software. But it also makes an excellent picture editor. In Preview, you may find basic tools for cropping, resizing, rotating, annotating, and other image adjustments.
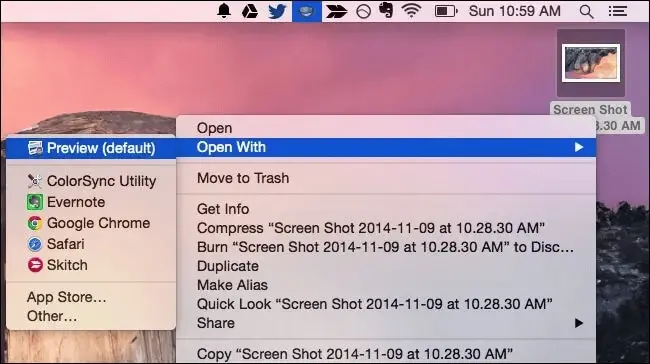
- To open the Preview app, launch Spotlight Search by pressing Command + Space, using the Launchpad, the Applications folder, or the word “Preview.”
- The picture file may be opened instantly from Preview.
- As an alternative, while Preview is open, click File and choose New.
- By utilising the Clipboard command, you may import an image file from your clipboard. To alter the picture and copy it back to your clipboard, click Alter and type Copy.
- A screenshot you take will be saved as a.png file on your computer’s desktop, which you can then open in Preview to begin editing.
Rotate an Image
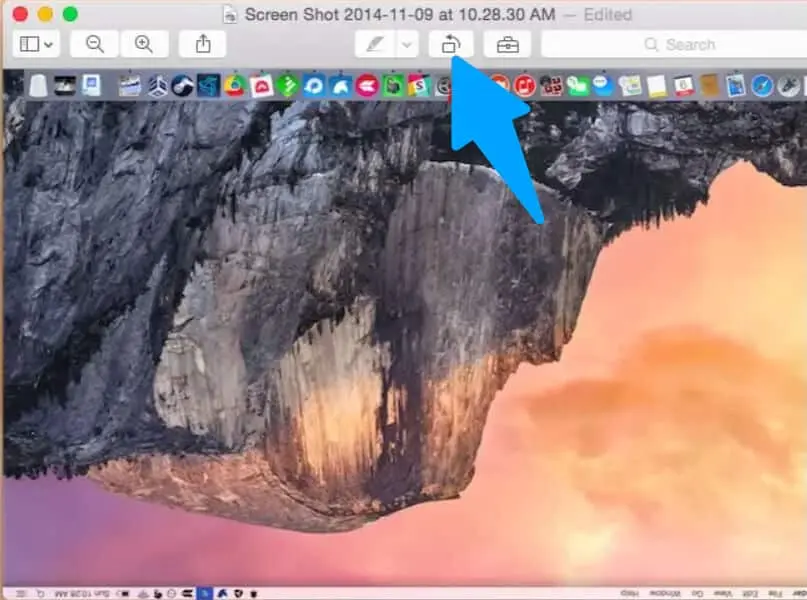
A photo may be rotated with ease. Click once or more times on the rotate button on the toolbar that is immediately above the window on the right. Additionally, you may choose one of the Edit menu options for Rotate or Flip.
Crop an Image
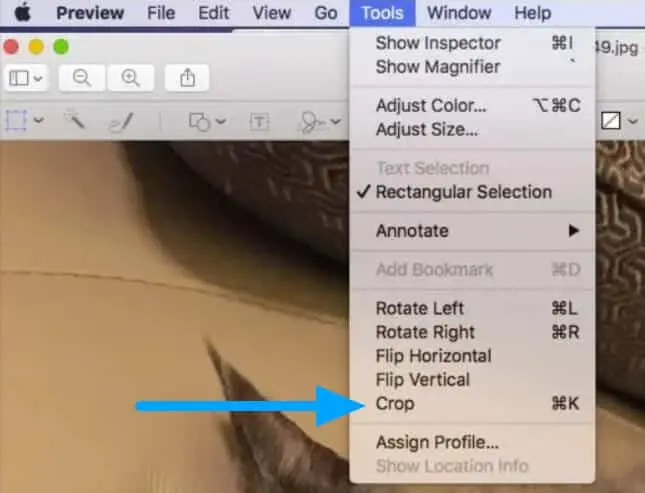
- After selecting the Tools option, select Crop.
- Any area of the photo can be cropped.
- Select File and Save as you would with any modification to save your changes.
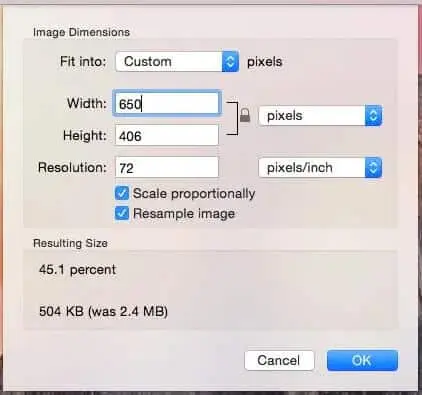
Resize an Image
- Select Tools.
- Choose Size Adjustment.
- The Resize dialogue box will be shown, and you may use it to resize the image. It takes several different measuring units, including pixels.
Annotate an Image
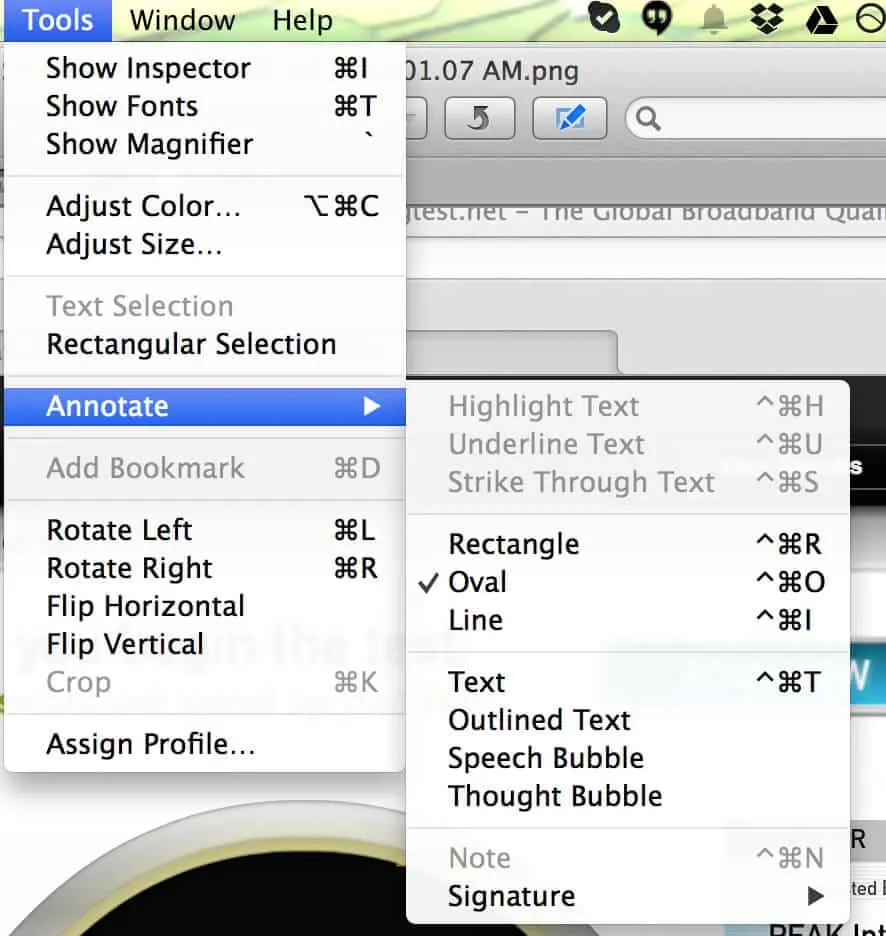
- Annotate can be chosen from the Tools menu.
- Select any one of these tools from the menu.
- You may add text, draw a line, highlight a section, create a shape, or insert an arrow using the tool of your choosing.
How to Copy and Share a Screenshot to the Clipboard
- To snap a screenshot, hold down the Control key continuously.
- For example, take a screenshot of a specific area of your Mac’s display.
- Initially, launch screenshot mode by pressing Command+Shift+4 on your keyboard.
- Press the Control key while deciding the area of the screen you wish to capture.
- You now have the screenshot you just captured in your clipboard.
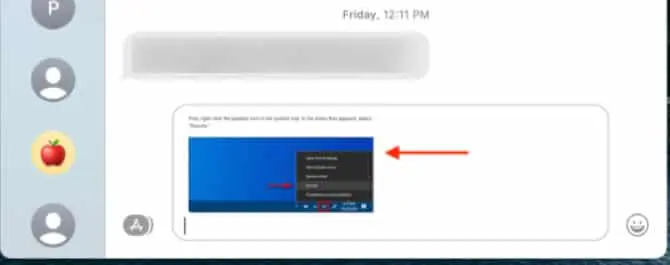
- It may be sent to a recipient using any messaging or sharing app on your Mac, including Messages.
- To pick a conversation and paste the picture into the text box, using the keyboard shortcut Cmd+V.
- Press the Enter key to send the screenshot.
How to Change the Location of the Saved Screenshots
If you have macOS Mojave or the most current update installed, changing the place where screenshots are saved is simple.
- Press Command + Shift + 5.
- Choose Options.
- After that, select a folder from the list or click Other Location.
- Choosing another location gives you the option to either go to the folder where you want the screenshot to be saved or, if required, create a brand-new folder.
- Once you’ve changed the location, your screenshots will remain there until you change it again.
Some Third-Party Screen Capture Apps
1. CloudApp
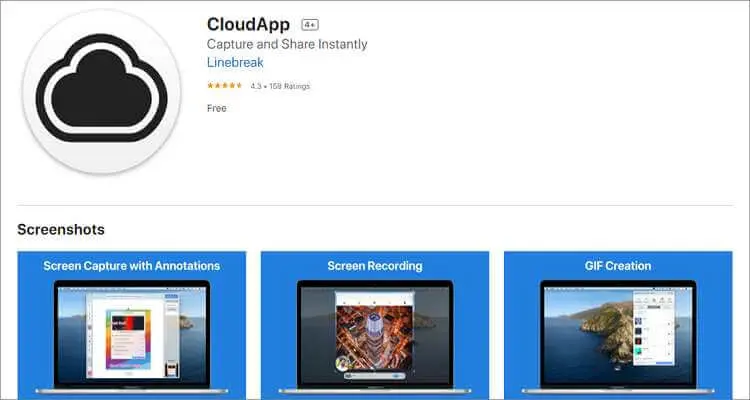
CloudApp is a free screen recording and screenshot app for iOS, Windows, and MacBook. Prior to purchasing for the app’s premium features, you will have a 14-day free trial. Surprisingly, this free app contains all the features you could possible need for screenshotting. CloudApp also provides the best customer service.
2. Techsmith Capture
On your MacBook, Techsmith Capture is a simple-to-use tool for taking basic screenshots and screen recordings. Users of this software may edit full-screen screenshots and local pictures using annotation capabilities including rectangle, arrow, size control, and many more. Users of this software may easily share their screenshots as well.

3. LightShot
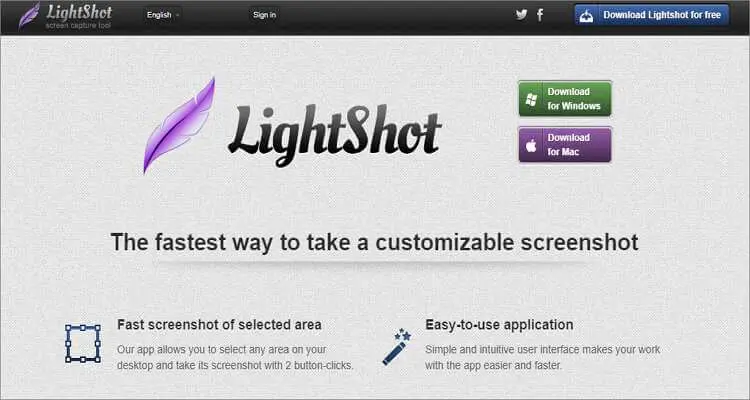
LightShot is one of the best apps for taking stunning screenshots on a MacBook. Despite its modest size, this app has a lot of powerful functions. Users of this app may also modify screenshots by adding other components including colours, text, and notes. The nicest thing about this app is how rapidly it can snap screenshots.
Conclusion
The above are indeed the best methods for taking screenshots on a MacBook. You can capture screenshots on your computer and edit them using a built-in software like Photos by using the keyboard shortcut. Another option is to use third-party photo editing software.


