Ever wondered transferring photos from your Mac to iPhone is not so tough as we think. There are numerous methods available like using iCloud , using iTunes ,using Airdrop and more such we discussed here. We’ll tell you the best way to transfer photos from Mac to iPhone!
What we will see here?
Using iCloud
- From your iPhone, choose Settings.
- See the name on your upper part of the device. Click that and proceed further.
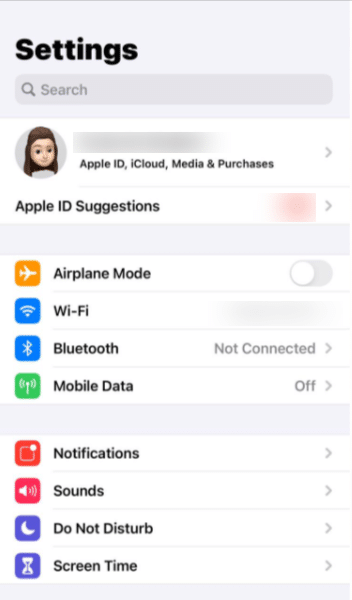
- Now choose Photos.
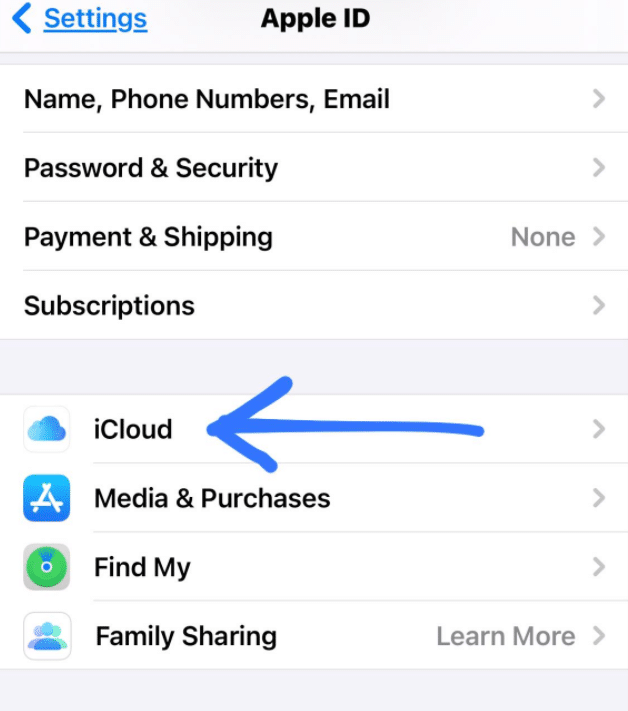
- Inside the Photos settings < toggle the iCloud Photos and turn it green
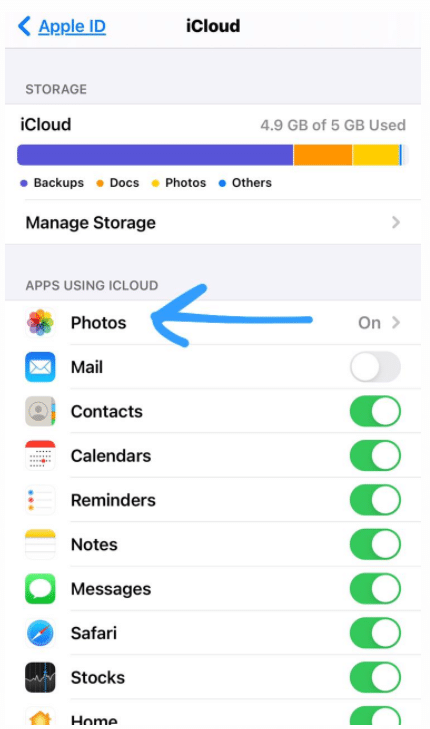
- In the end, whenever you need to transfer the photos through iCloud, just add these photos to the Mac’s Photos App. They will get uploaded and now you will be able to download them on your iPhone.
- To add photos using iCloud, click on the “Upload photos†button at the top-right corner and select the photos you want to transfer.
Using iCloud Photo Library
iCloud Photo Library is the most preferred method . Here’s the means by which to enable the iCloud Photo Library.
- Go to the Photos app on your Mac.
- Then see Preferences.
- Snap the iCloud tab.
- Check the iCloud Checkbox.
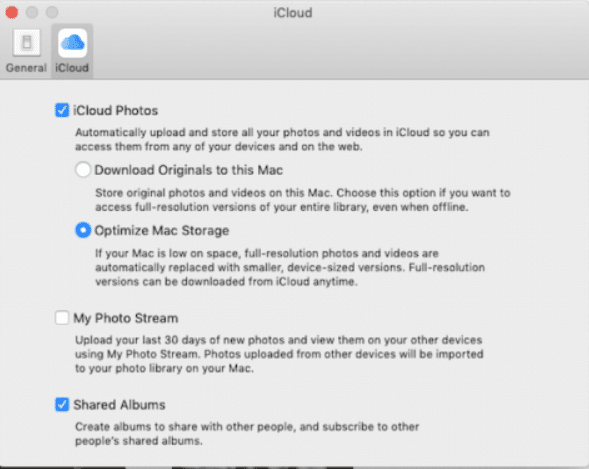
For macOS Catalina
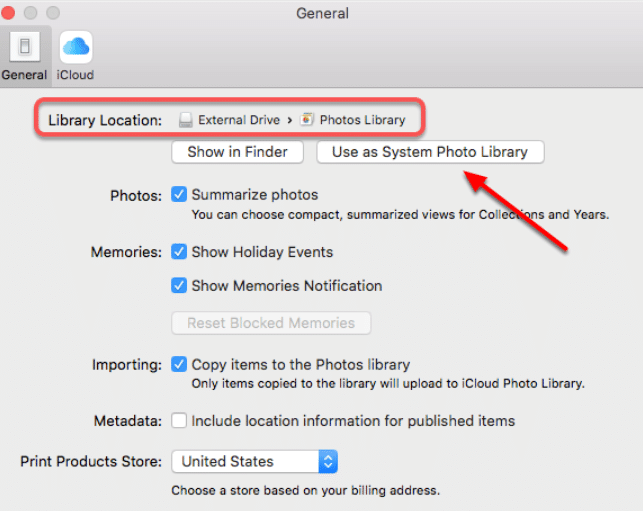
If you are using macOS Catalina, then you just make sure that you turn on System Photo Library
Photos App> Preferences>General> Use as System Photo Library
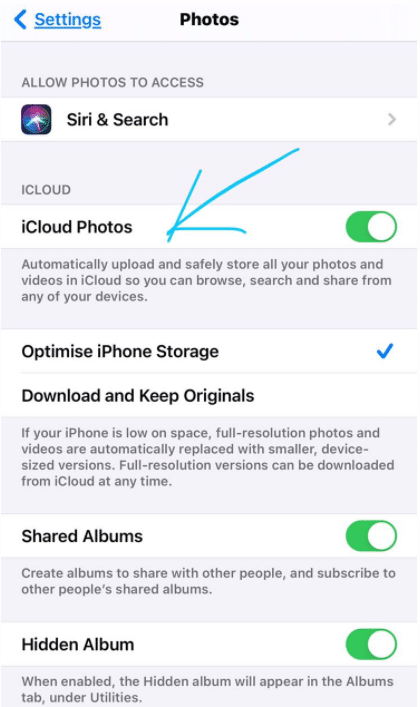
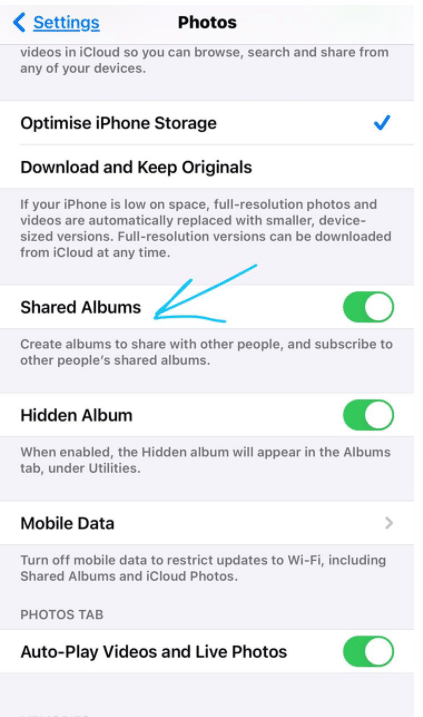
Now you have to make sure you enable the “Shared Albums feature” on your respective iPhone .
- Settings>Photos>”iCloud Photos” feature on and “Shared albums” feature on
Using iTunes
If you don’t have an iCloud account, you can still transfer pictures by connecting your iPhone to your PC using a USB cable. Once you have your devices connected:
In case that you don’t have an iCloud account or you do not want to go with the iCloud method then surely you can prefer iTunes.
- Open iTunes.
- Then proceed forward and click iPhone button in the top-left of the iTunes window.

- In the sidebar, click Photos.
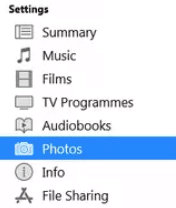
- Check the box to Sync Photos.

- Choose either Pictures or Choose Folder in the drop-down menu.
- Select the option to sync all or only selected folders.

- Now go ahead choose Apply at the bottom.

Using Google Photos
Yes you heard it correct, use Google Photos to transfer your photos from Mac to iPhone. Create a Google Photo account and load all your Mac Photos in Google Photos app . You can do this by dragging photos to the Google Photos.
Now on your iPhone, when you open the Google Photos you will find your Mac Photos. Sounds like magic ,right ! The easiest method I guess.
Use AirDrop to transfer photos from Mac to iPhone
- On your device, make sure you have turned on both the Wi-Fi and Bluetooth on . Just confirm this through the control center.
- Open the Photos app on your iPhone.
- Select the photos.
- Choose the Share icon.

- Go ahead and select Airdrop from the options.
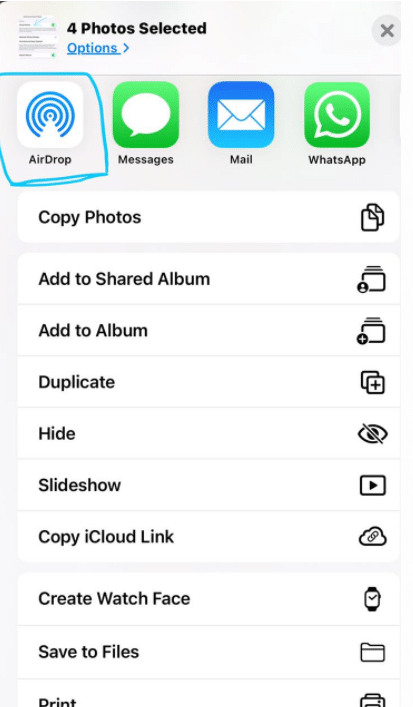
- Check in the Downloads folder on your Mac to find these images.
Using Dropbox
Another extraordinary alternative to consider when you need to move photos from Mac to iPhone is to utilize a third-party syncing service, as Dropbox. You could upload your pictures to your Dropbox account in two ways:
- From the web.
- Adding photos to your Dropbox folder once you install Dropbox on your Mac.
Meanwhile on your iPhone or iPad, simply download the Dropbox app and access your photos.
While we like to utilize Dropbox for my photos, there are numerous choices that you can use too, like Google Drive, Microsoft OneDrive,
Conclusion
When you want to share your photos saved in your Mac to an iPhone, then clearly you need to choose a method which can transfer them securely. For some it is just a normal task but for others , it may get confusing and a little hard .
Check out our more articles!
- Dropbox-Everything team needs, a Cloud Storage.
- Ways to AirDrop on Mac! Everything you need to know about file transfer on Mac!
- AirDrop – Basics you need to know about AirDrop !
- How to transfer photos from your iPhone to your Mac?
- Fix Airdrop on iPhone, iPad or Mac if it isn’t working-Everything you need to know about!


