Installing an M.2 SSD on your desktop is either a required component of any PC design or a simple update to make your PC seem quicker. Fortunately, installing an SSD on a PC is less difficult than picking the best one or even knowing how they function. I’m not going to go through all of that here, but I will go over how to install both types.
The techniques outlined here should work for practically any model. I’ll start with the M.2 SSD because it’s a little trickier to install and requires some knowledge before you do it.
What will you see here?
How to install an M.2 SSD on a desktop PC?
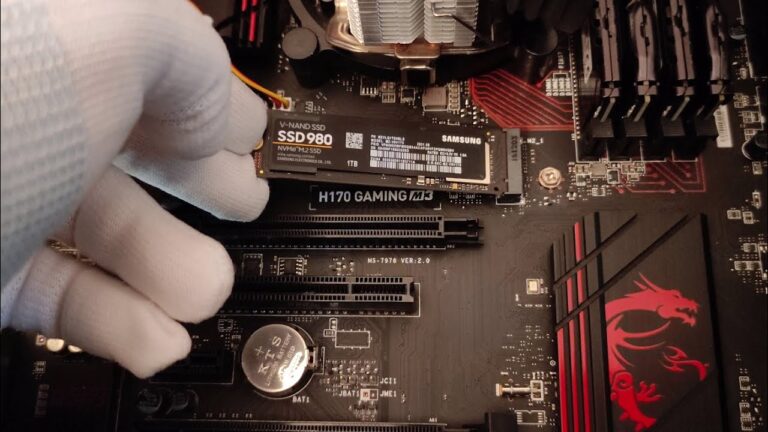
An M.2 SSD resembles a chewing gum stick, with chips on one side, a label on the other, and gold contacts on one end. Some will install in this manner. Some will have their own heat sinks and will resemble a pack of gum rather than a stick of gum. However, some motherboards feature an M.2 shield, and you’ll have to wriggle the drive below it. Follow the below steps to install SSD on a laptop PC:
1. Find the M.2 slot to install the SSD
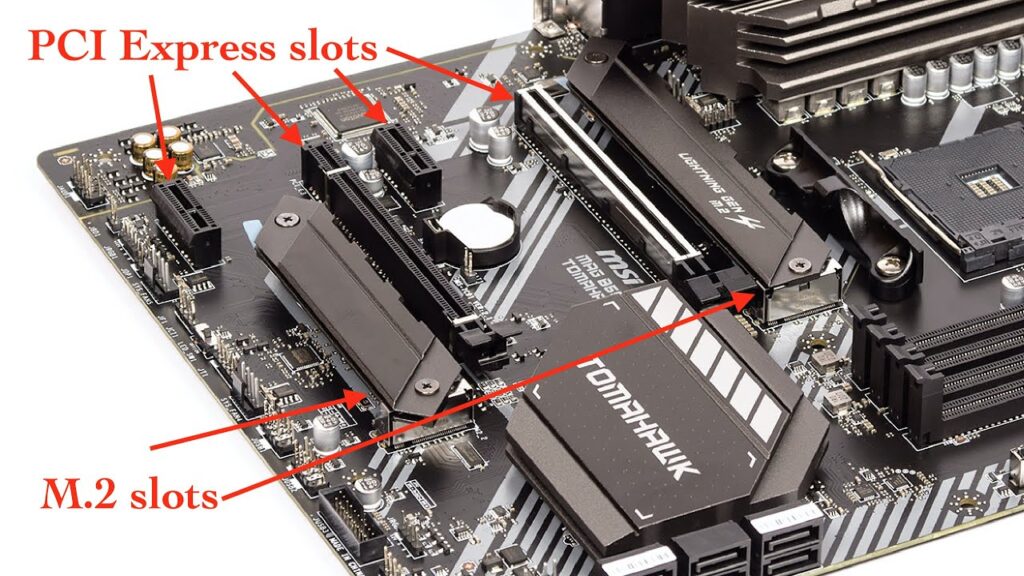
The first thing you should do is locate the M.2 slot on your motherboard. Look for a one-inch-wide slot that protrudes roughly a quarter-inch from the motherboard. Every motherboard is unique. However, the most typical spots are beneath the CPU and around the PCIe slots in the board’s lower half. If you can’t locate it, look in the handbook.
Some motherboards have a shield that not only functions as a heat diffuser but also adds a wonderful touch of aesthetic flair. This must clearly be removed before you can reach the M.2 slot.
If your motherboard supports two M.2 SSDs, consult your documentation to see which slot is suggested for putting your boot drive. Each slot may provide a variable amount of performance, while some may disable a PCIe slot if it is used. In a nutshell, read the handbook first!
2. Find the M.2 Mounting System to install the SSD
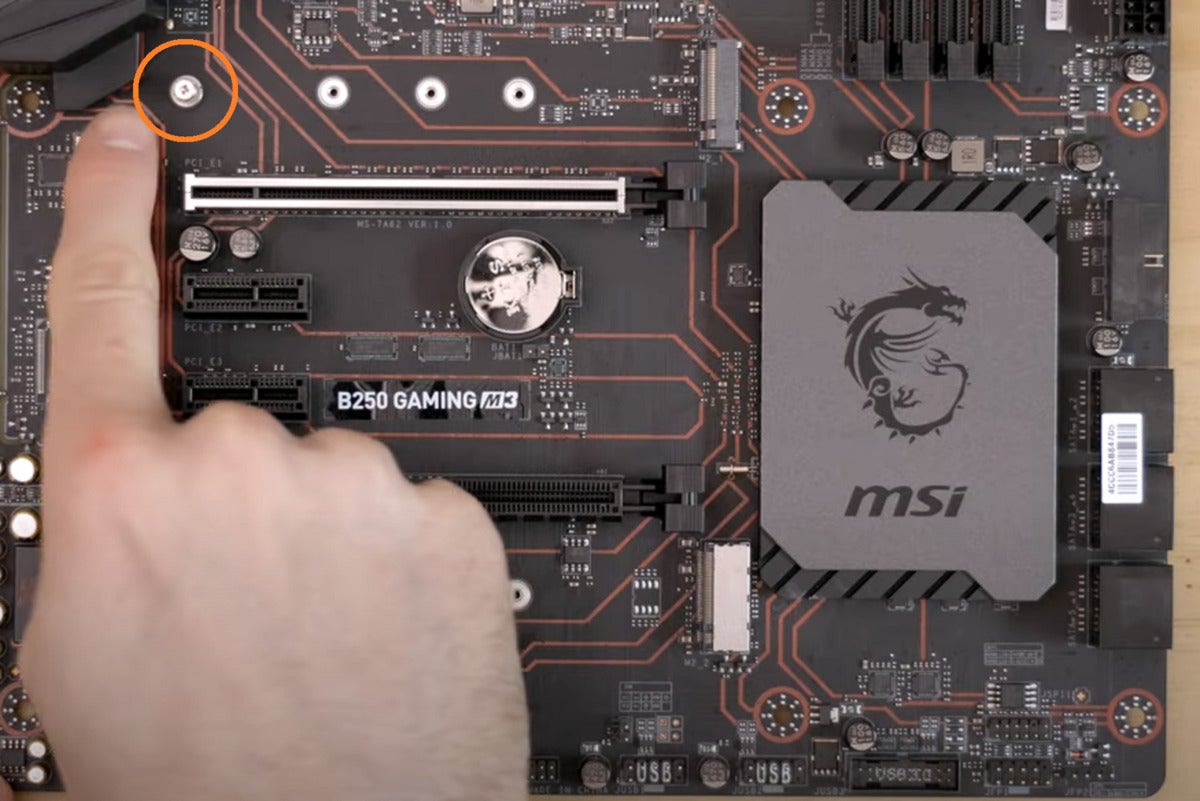
Once you’ve identified the correct slot, look for the screw that’s fitted into a standoff approximately three inches to the left. The standoff is included because there will be a space between the SSD and the motherboard when the drive is attached. The standoff is critical in keeping the drive flat.
If your motherboard lacks the screw or standoff, check the box—it might be in a little plastic bag. If your motherboard has an M.2 shield, locate the two screws that secure it to the motherboard.
3. Prepare for M.2 SSD installation
To ground yourself, touch anything metal, such as a metal furniture leg, and then grasp a screwdriver. Remove the screw from the standoff and store it safely—you don’t want to lose a screw or have it roll about on your motherboard.
Unscrew the shield from the motherboard, but take notice of the bottom, where there should be a thermal pad with a piece of plastic covering it. Place the shield somewhere secure without removing the plastic.
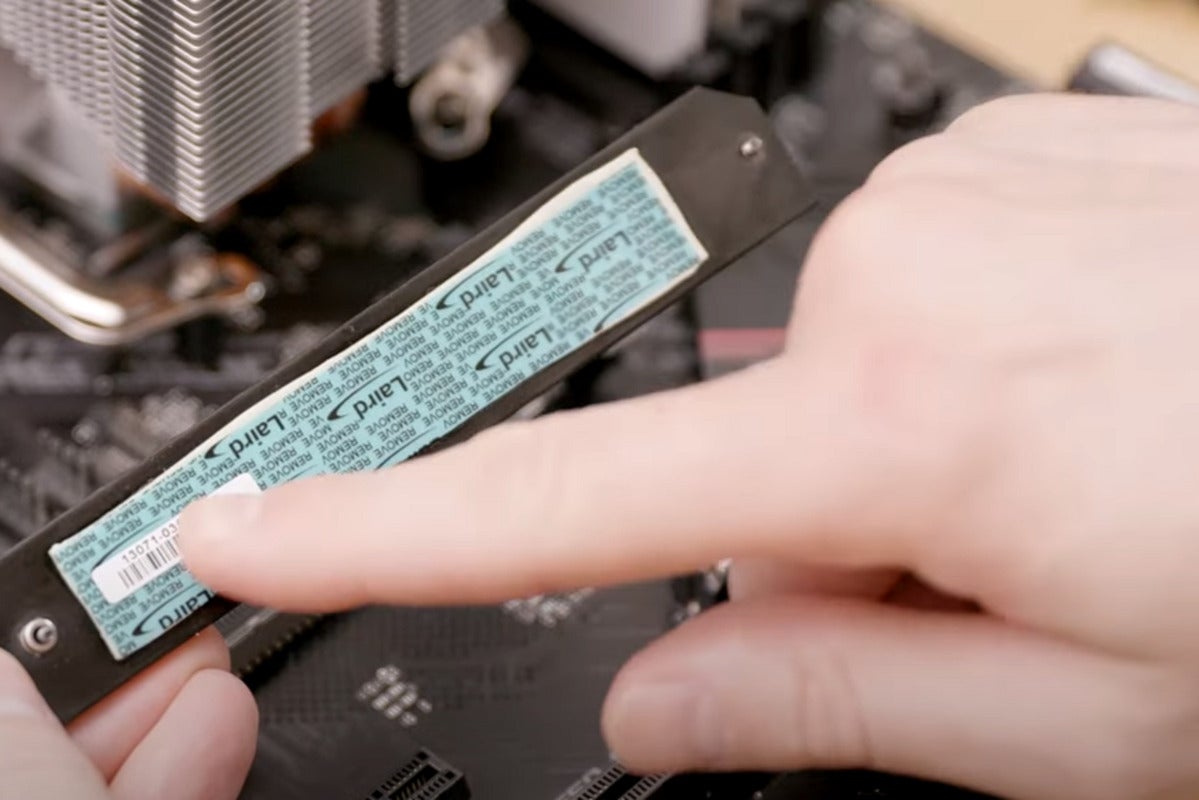
The most frequent M.2 size is 80 millimeters. However, in any case, ensure sure the standoff is properly positioned for your drive size. Hover the drive above the slot and measure its length. If required, use pliers to loosen the standoff and adjust it to the proper length. Make sure the standoff is completely screwed in–not too tight, but snug. You don’t want it spinning while we’re attempting to screw it in.
Those of you with shields are unlikely to have a standoff. Instead, there should be some kind of squarish bracing for the drive to rest on while the shield keeps it in place.
4. M.2 SSD installation
The drive should now be inserted. Consider the drive’s “top” to be the side with the brand’s label or sticker. The screw will be used to secure the edge with the semi-circle notch. We place the edge with gold contact points into the M.2 slot.
A little notch separates the contact points into two portions. With the top of the drive facing up, align that notch with a notch within the M.2 slot. Insert the drive firmly at a 15-degree angle until there is no more give, then release it.
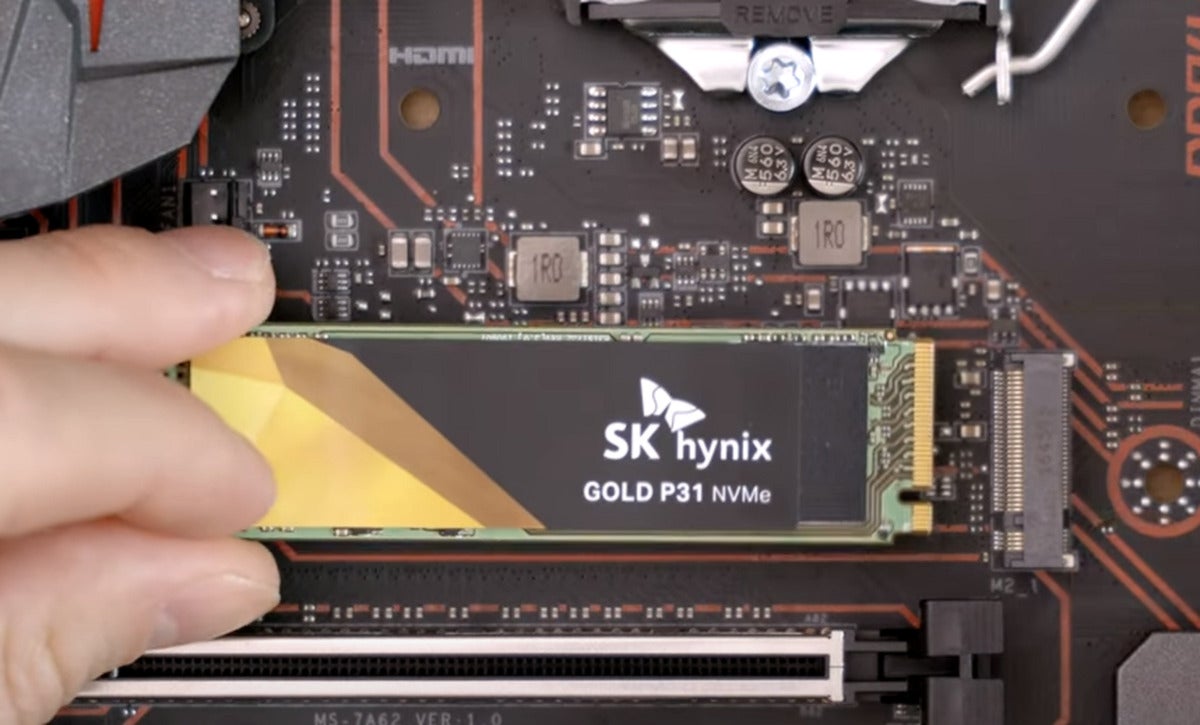
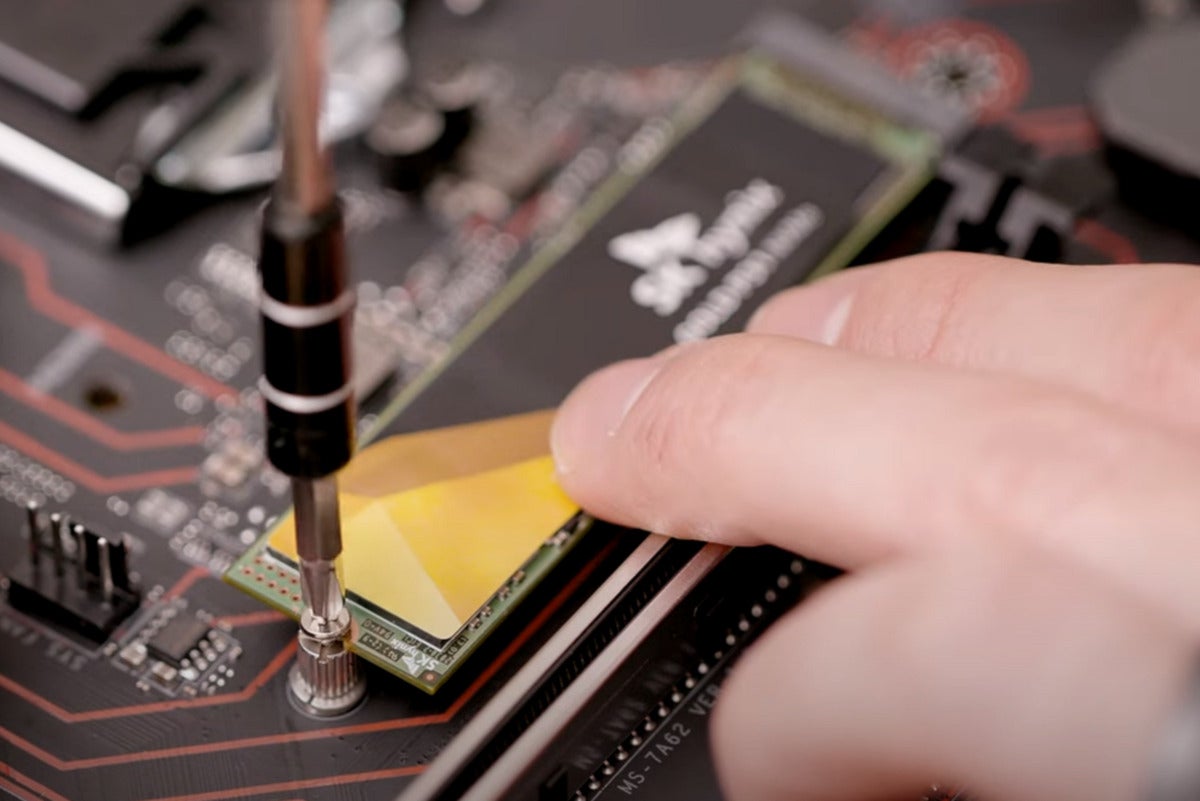
If you’re using a screw and standoff arrangement, press down on the drive until it’s flat and the semi-circular notch lines up with the standoff. Insert the screw while holding the drive flat, and tighten to a comfortable level. If you overtighten the screw, you risk damaging the drive, the screw, or the motherboard. If you fit it correctly, the drive should not move at all.
Those of you with shields will have a bit more to deal with, so take your time with these following stages. Because there is no screw to hold the drive flat while you lay the shield over it, you’ll have to hold it down or seek aid from someone who can hold it flat as you handle the shield. It may be useful to perform a dry run before removing the plastic sheet from the thermal pad—just be careful not to leave the plastic on permanently!
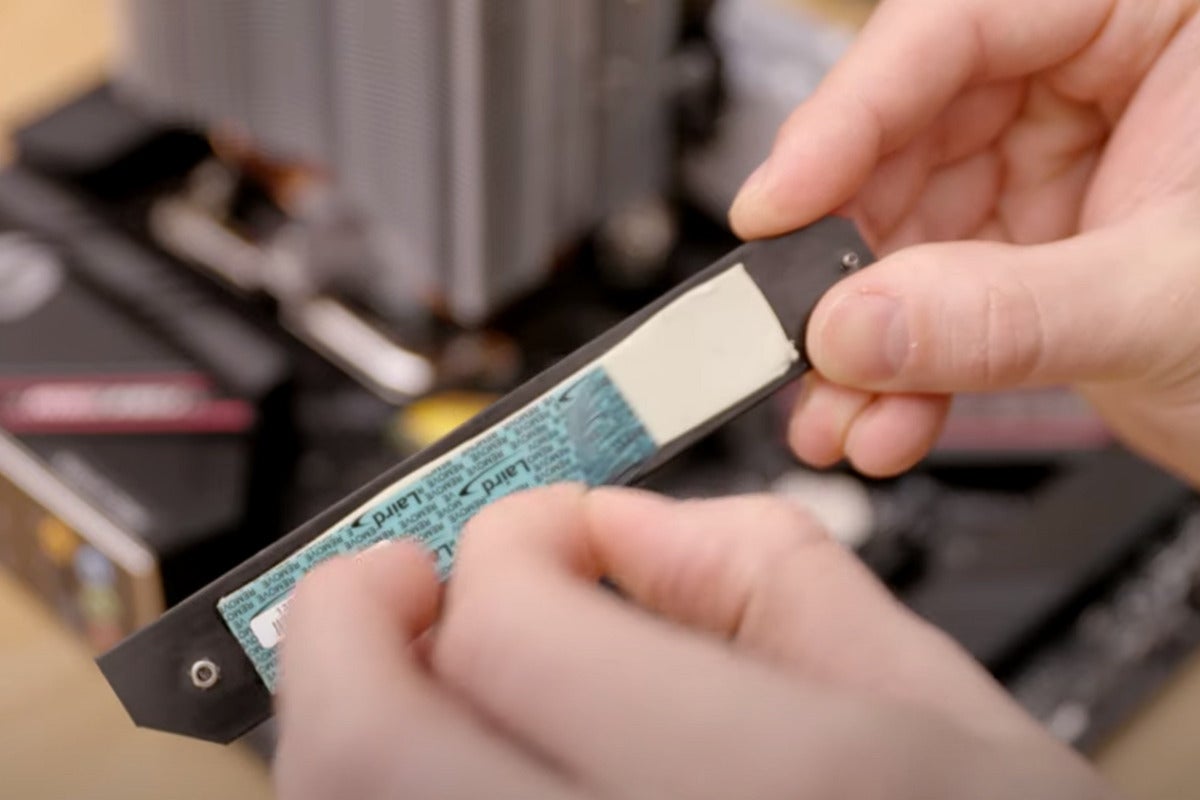
When you’re ready, remove the plastic and lower the shield directly onto the drive. Because the thermal pad is sticky and may cause the drive to slip out of its slot if you shift it after it’s bonded to the shield, it’s critical to lower it directly onto the drive. If this occurs, do not panic: gently remove the SSD from the thermal pad and restart.
Carefully Aligning The Screws
The most difficult element here is aligning the screws with the standoffs. One approach is to lower the shield while holding the screws in place. This permits the screws to make contact with the standoffs before the thermal pad makes contact with the drive.
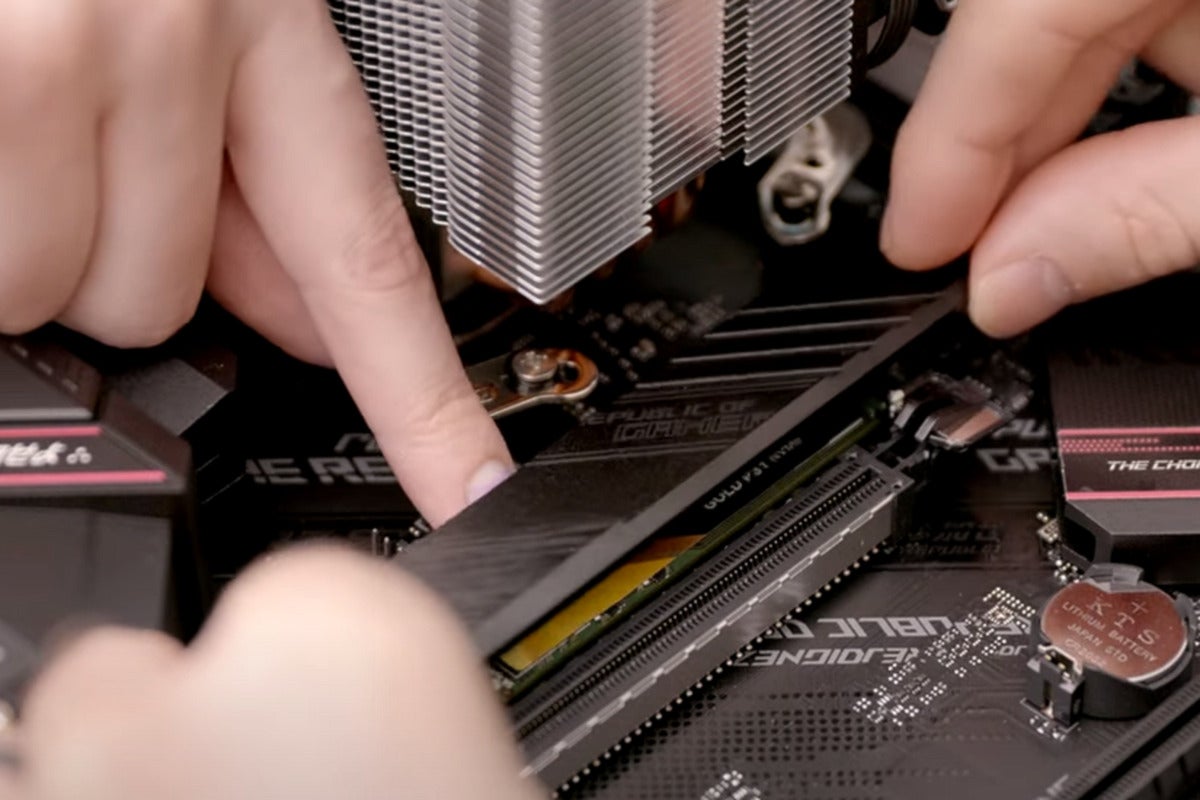
Lower the shield into position and tighten the screws once the screws are lined properly. Again, there’s no need to overtighten them–just snug.
Conclusion
In conclusion, certain M.2 SSDs include their own built-in heat sink. The heat sink on some drives can be so large that it makes the drive difficult to mount. Most of the ones are less noticeable. If your motherboard includes a shield, don’t put it over the provided heat sink. Simply save the shield somewhere secure in case you need it in the future.
Read More:
- ECS EliteGroup LIVA Z3: Mini Look Massive Performance!
- Upgrade the 2012 Mac Mini for using it now?
- Nvidia Shield TV 2019: The Ultimate Gaming and Streaming Device!
- The best motherboards you can get to boost gaming performance!
- The best wall outlet with USB charging ports in 2025!


