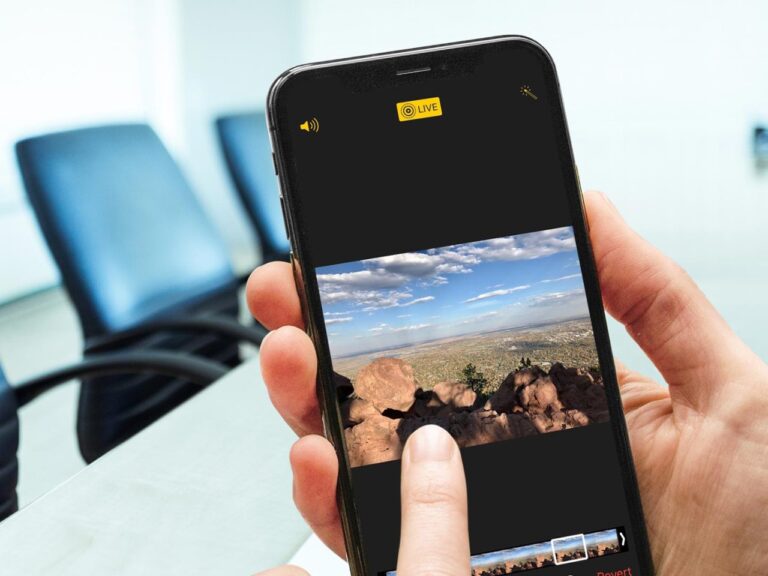
Live Photos is an iPhone camera highlight that rejuvenates development in your photographs! A kind of animation found on the iPhone.Rather than freezing a moment with a still photograph, a Live Photo catches a 3-second moving picture. You can take live photos on iPhone 6s and later models.
What we will see here?
What is a live photo?
Live photo basically is a motion picture captured on iPhone . Both video and audio is recorded .Duration of capturing is 1.5 secs before and after . You can access all your live photos in the Photo Library. You can edit them , turn them into videos and gifs , make stills from them and even share them. Live Photos can be taken on an models such as iPhone 6s or 6s Plus, iPhone SE, iPhone 7 or 7 Plus, iPhone 8 and 8 Plus, and iPhone X and later. Mac users can likewise see them inside the Photos app on Macs running OS X El Capitan or later.
Turning Live Photos on and off !

On the upper part of the screen you can find a circle like icon that symbolizes live photo. You can turn this on and off . On the newer models iPhone 11 and iPhone 11 Pro models, there is additionally an Auto option available.
Taking a Live Photo with your iPhone or iPad
You can capture on iPhone normally or whether to take them as live or not totally depends on you. The live feature can be put to on or off. Live Photos can take a huge lot of storage space because it probably captures a 3 secs video -like picture. It is like an animated version of the normal photos on the iPhone.
- Go open your camera from the Home screen.
- Tap the Live Photo button, the top centre resembles a circle to toggle it on. This will highlight it as yellow.
- Select the Shutter button to take your Live Photo.
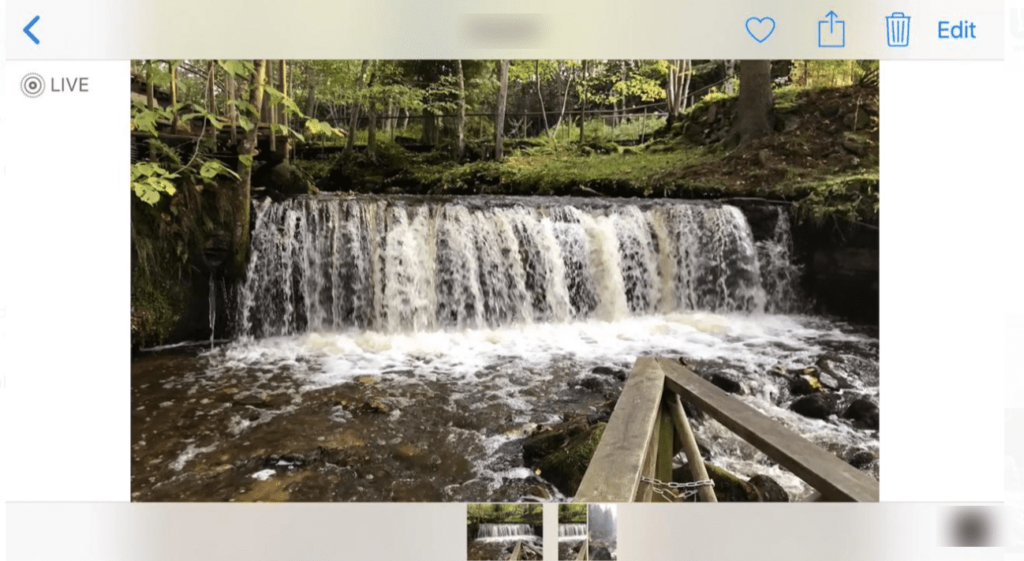
Your live photo is now captured and you will see on your photo “LIVE” stating that its actually a live photo and not any other.
Viewing Live Photos
Viewing a Live Photo on the iPhone 6s and later models isn’t that hard . Let us see how you initiate .
- Go to the Photos app from your Home screen.
- Under the media types section, select “Live Photos”.
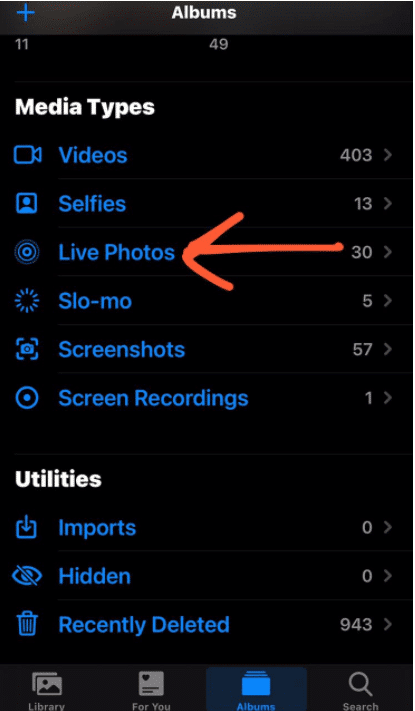
Editing Live Photo
- Go to the Photos app from your device.
- Under the media types section, select “Live Photos”
- Find the Live Photo you want to view.
- Select Edit.
- You can now see various options like adjusting the live photo, effects, choosing the key photo for a live photo.

“Adjust” -ing the live Photo
- Find the Live Photo you want to view.
- Select Edit .
- You can choose from : Exposure, Brilliance Highlights, Shadows, Contrast , Brightness, Black Point , Saturation, Vibrance, Warmth , Tint, Sharpness, Definition, Noise Reduction and Vignette . You can do this all simply sliding the option bar (see arrow below).
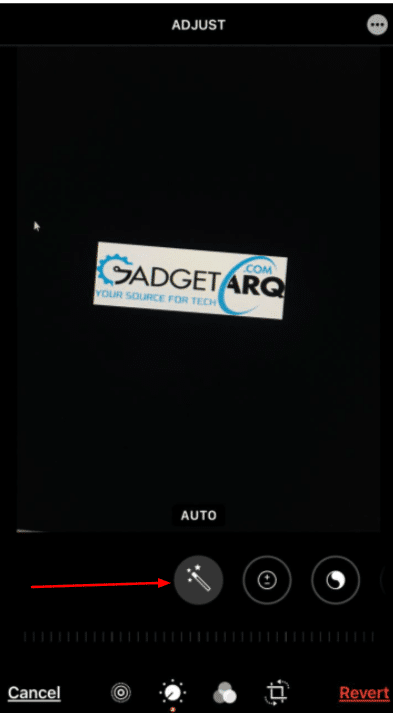
Applying Filters to live Photos
- Find the Live Photo you want to view.
- Select Edit.
- Then tap the “three circles overlapping” symbol (marked in blue.)
- Choose the filter by swiping the slider( marked in red.)
- You can choose the intensity of the filter found after the filter slider (Marked in yellow).
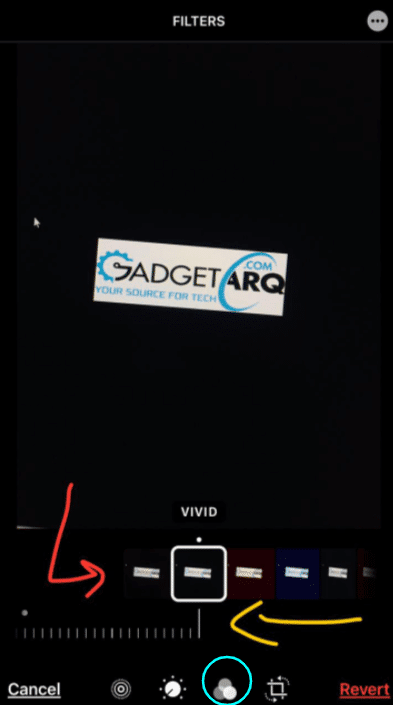
Selecting a Key Photo
- Find the Live Photo you want to view.
- Select Edit .
- Then choose ” live photo” symbol. (Marked with blue).
- Bow you can slide off and choose your key photo.
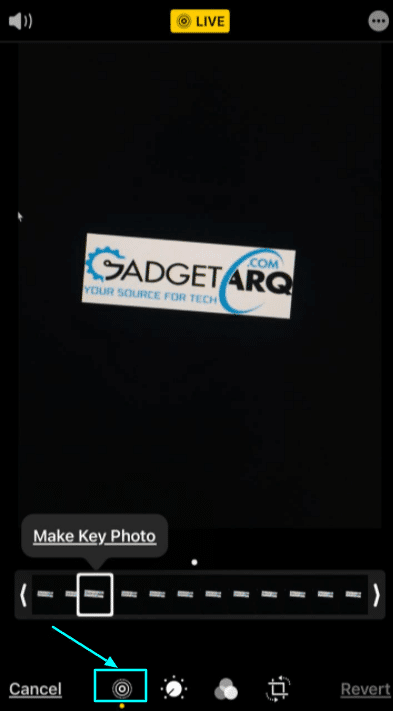
Cropping Live Photo
- Find the Live Photo you want to view.
- Select Edit .
- Then choose crop symbol (marked in blue).
- You can choose the intensity slider (marked in yellow) to rotate your photo, to enlarge your photo, to change the shape of your photo.

Sharing Live Photos on your iPhone or iPad
You can share your Live Photos using the default share symbol. Here’s the secret!
- Go to the Photos app from your device.
- Select the Live Photo you’d prefer to share.
- Tap the Share symbol on the bottom left of your screen. It’s a box with an upward-pointing arrow.
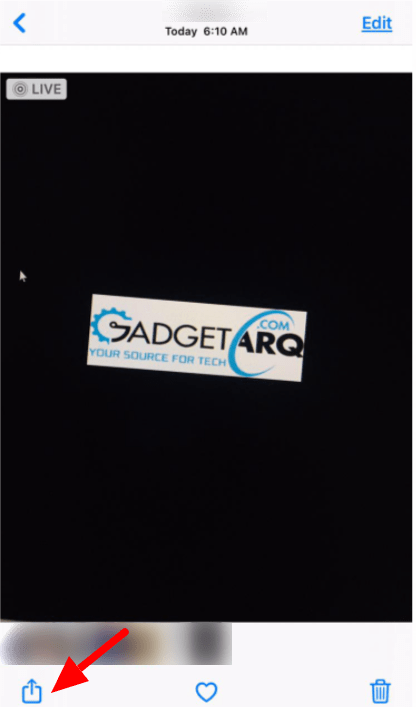
- Choose your sharing method. You can share your live photo to any social media platform, and you can even share your GIFS to YouTube.
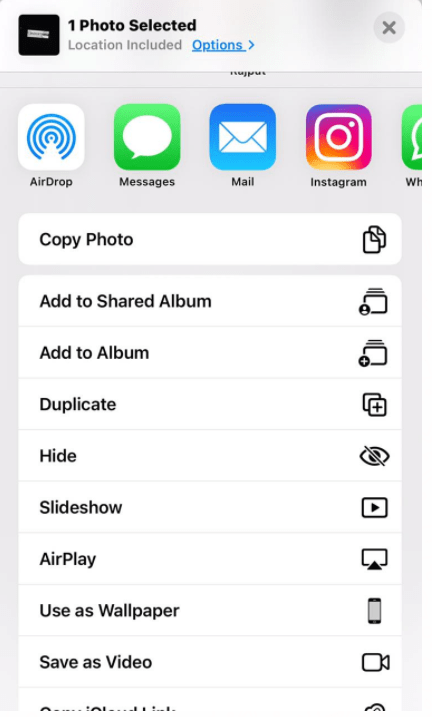
Setting Live Photo as the wallpaper
You can set Live Photos as your wallpaper on iPhone 6s or later, which functions admirably for friends and family, kids, pets, and landscapes.
- Go to the Photos App from your device.
- Select the Live Photo you want set as a wallpaper.
- Choose Share symbol.

- Go with the “Use as wallpaper” alternative.
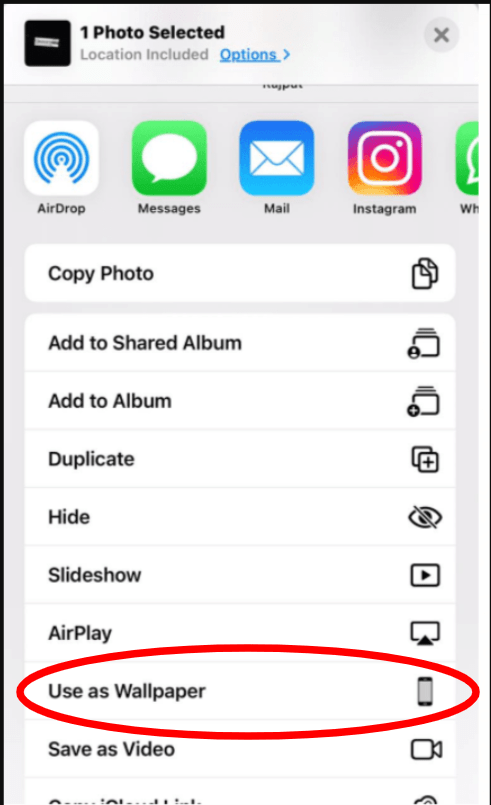
- Choose Live Photo on the base of your screen if it’s not already chose(marked in red).
- Choose Set( marked in blue).
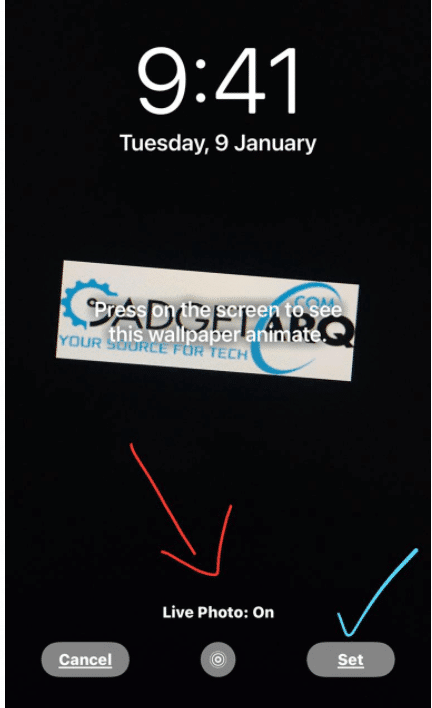
- Then choose your alternative for Set Lock Screen, Set Home Screen, or Set Both.
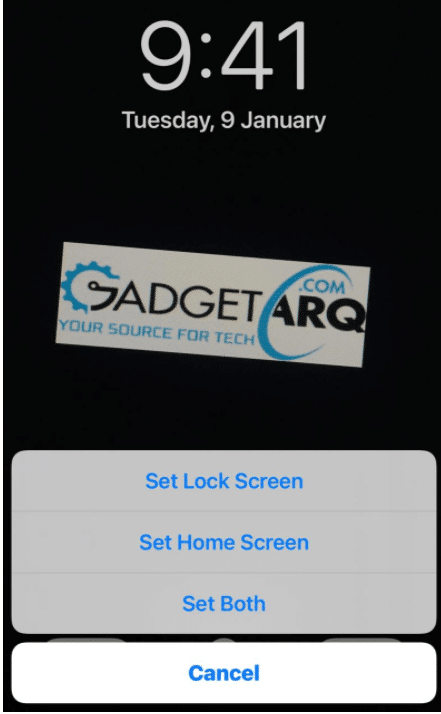
Duplicating a still shot from a Live Photo
On the off chance that you want the photo yet without the fancy moving part, you can make a copy that gives you simply that. You can also send out Live Photos as GIFs!
You don’t want to ruin your 3 sec live video but still want a part of it as a still photo , then you need to apple the “Duplicate ” feature found when you choose the share syymbol.
- Open the Photos app.
- Choose the Live Photo you want to take a still shot from.
- Go on with the Share icon in the bottom left corner of the screen.

- Choose Duplicate from the options at the bottom of the screen.
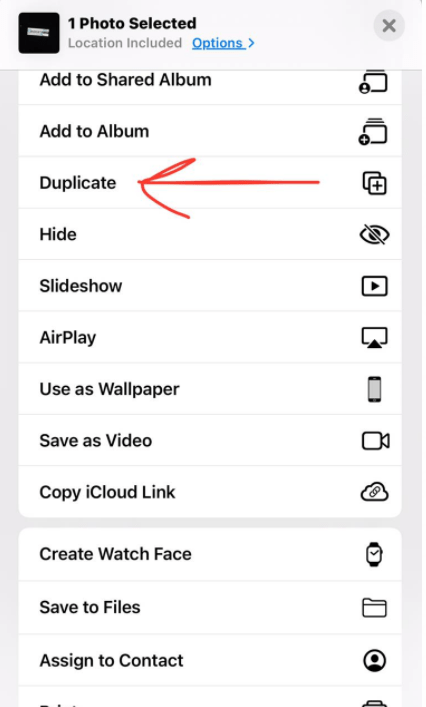
- Choose Duplicate as Still Photo.
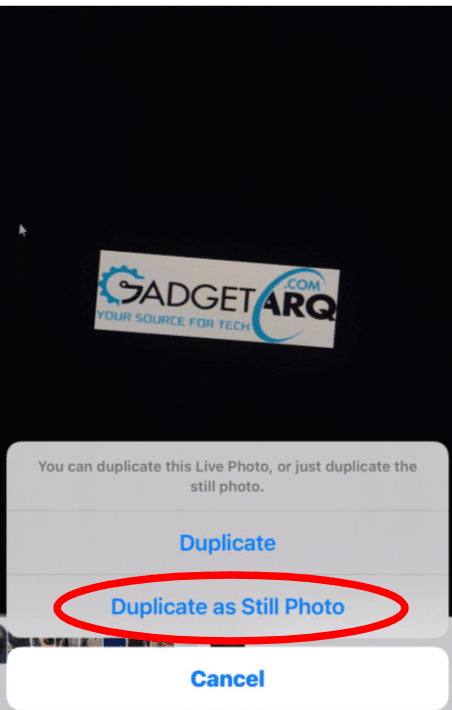
This still photo will appear in your library next to your original Live Photo.
Transforming a Live Photo into a GIF
Transforming a live photo into GIF really sounds fun.You can do it all right in the Photos app!
- Go to the Photos app from your device.
- Search the Live Photo you’d prefer to transform into a GIF.
- From the centre of the screen, swipe up to discover all the effects.
- Choose loop to convert the Live Photo as a GIF.
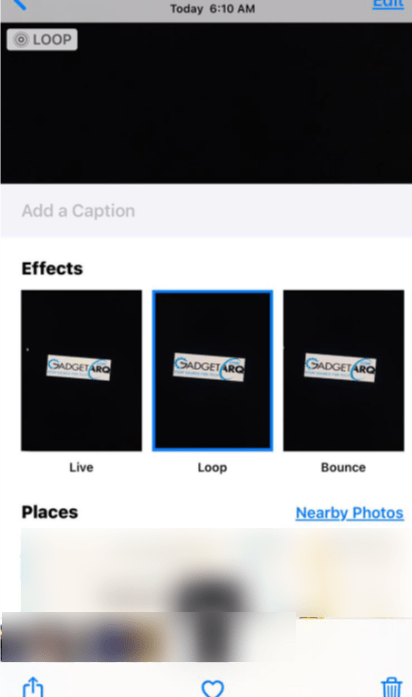
- Check now your live photo has been converted to loop , basically a GIF.

You’ll at that point have the option to find your GIF in the Animated album in the Photos app.
Making video from live photo
In iOS 13, Apple added the capability to join together different Live Photos to create a video. You don’t have to import your Live Photos into an app like iMovie to do as such.
- Go to Photos from your device.
- Choose all the Live Photos that you want to create a video.
- Select the Share symbol.

- Look down and select Save as Video.
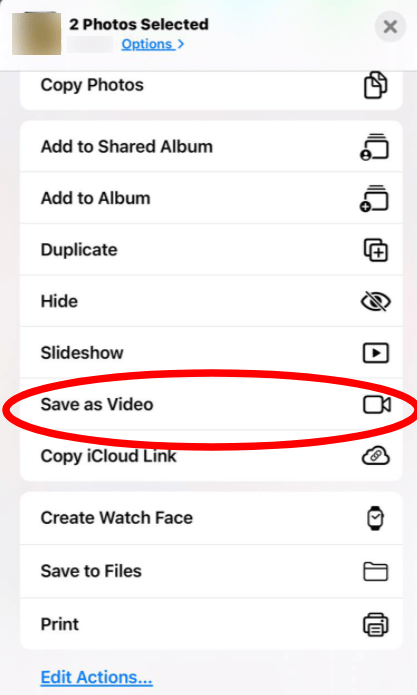
- Your new video will be in the Recents album.
Hiding a Live Photo
- Go to Photos from your device.
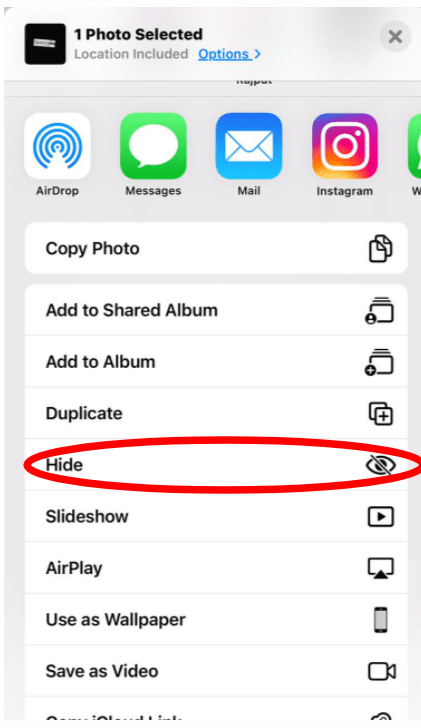
- Select the Live Photo that you want to hide.
- Choose the arrow share symbol.

- Choose from the dropdown “Hide ” option and you go!
Questions?
Live Photos on the iPhone are three-second moving pictures that Apple originally presented with the iPhone 6s. . There’s a ton you can do with your iPhone moving pictures.


